 Aloke
AlokeAdding a branch
Adding, labelling, the franchisee, and detaching.
- Aloke Owners
- Web, iPhone and iPad, Android
A branch joins your brand through one of two doors: one you already verified attaches on a press, and one you have not starts with an ownership claim, and the day we approve it, it joins on its own and its 30-day free trial starts.
- In the Aloke Owners app, open «Brand and branches» from the home screen, then «Branches». (iPhone and iPad, Android)
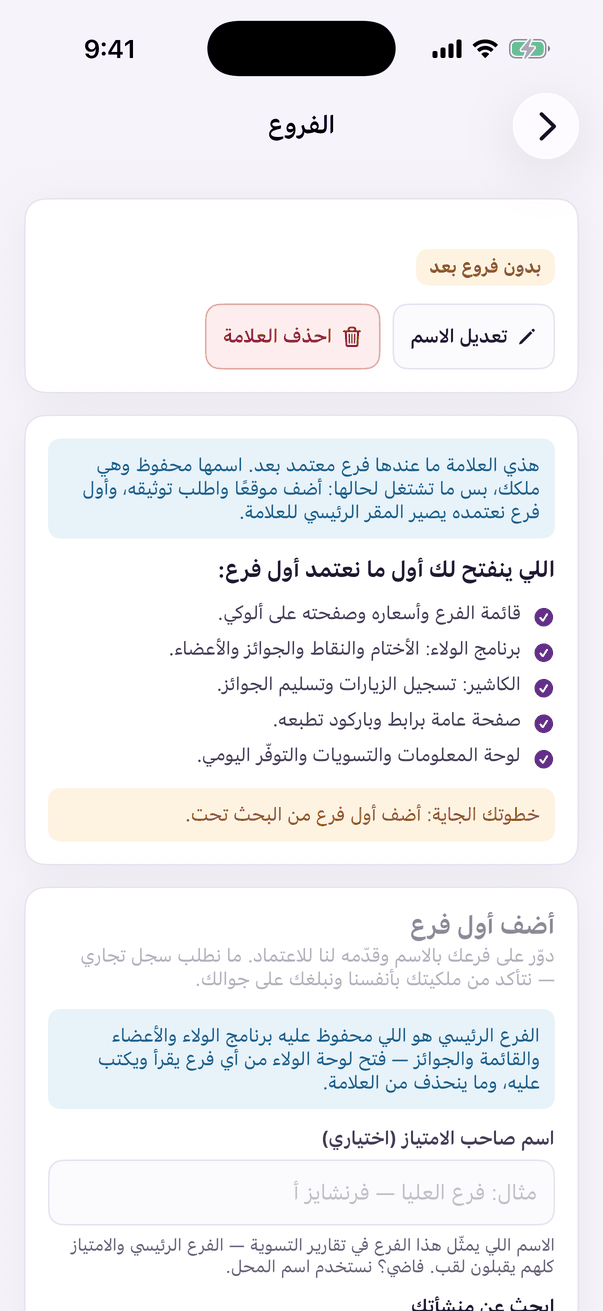
«Branches»: the branches under your brand.
Where to find «Add a branch»
Where the block stands depends on your brand's state, and it is ONE block with two faces: before you have any branch it sits on the brand card itself and reads «Add your first location»; once the first branch joins it moves into the «Branches and locations» fold on the home branch's «Business details», and gets a fixed address you go to rather than one that follows you around. (Web)
- With no branch yet, the block is on your brand card and reads «Add your first location»: with a line saying this branch becomes the MAIN one: it holds the loyalty programme, the members, the menu and the prizes, and it cannot be removed from the brand.
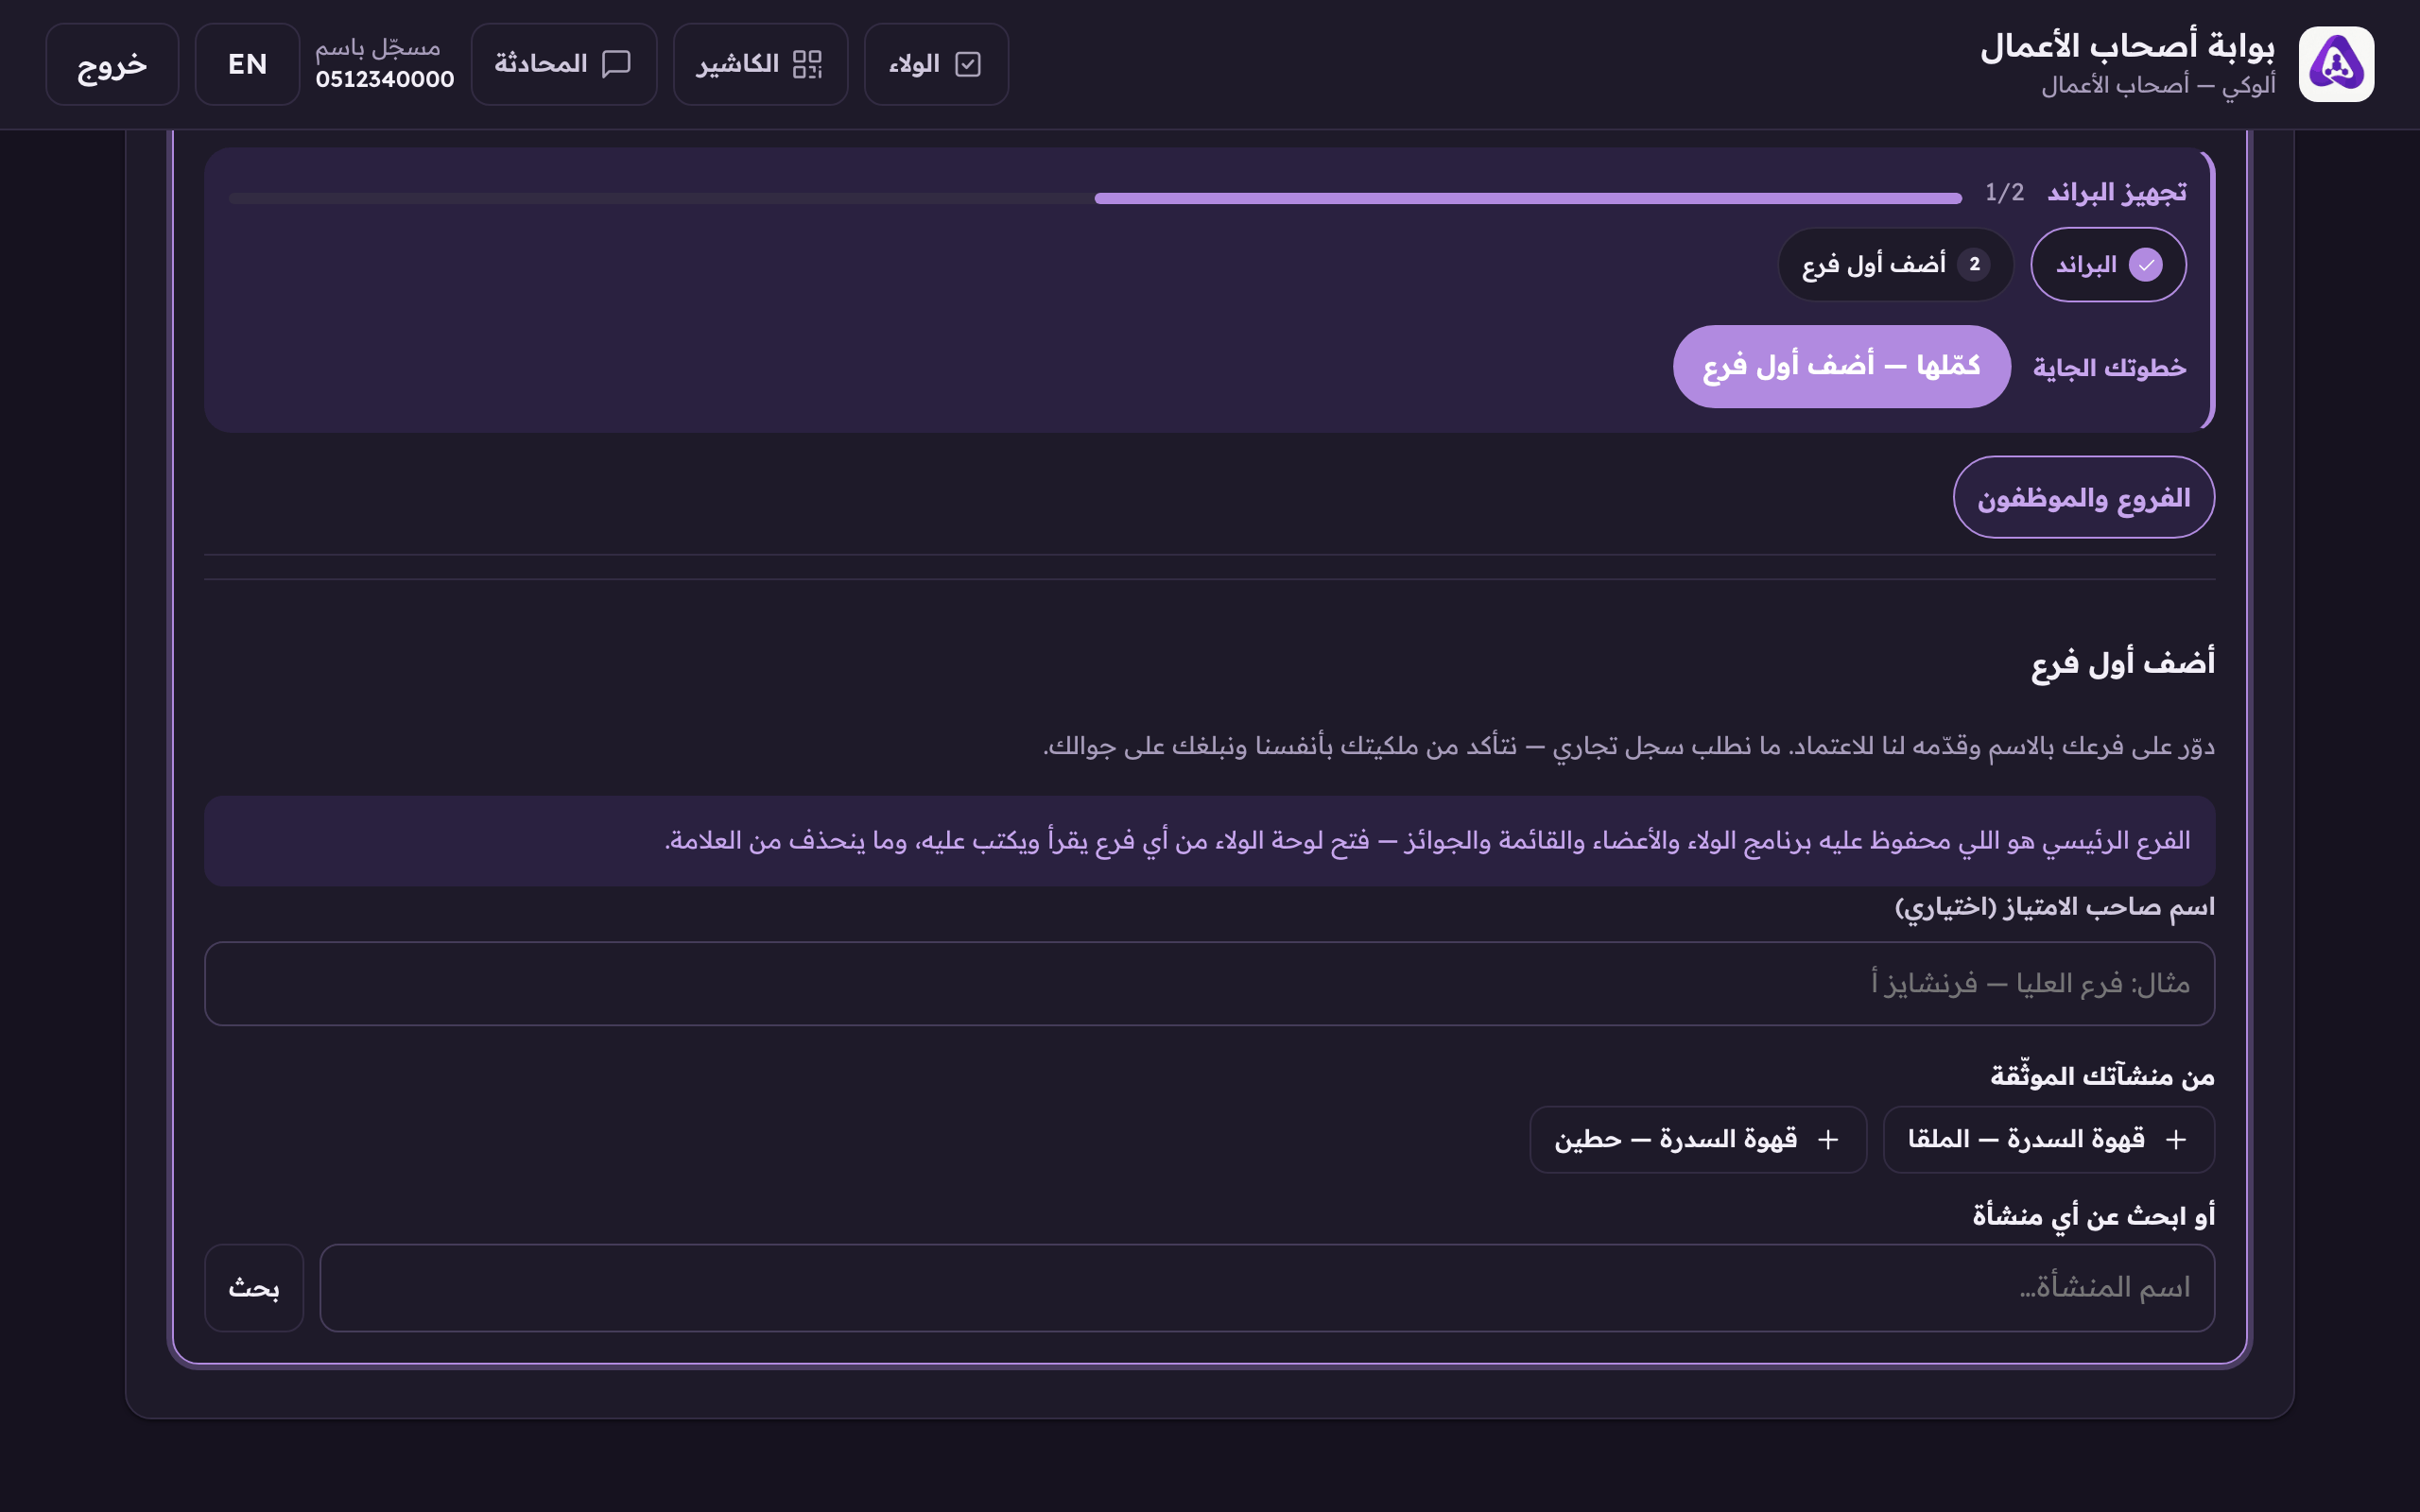
The first time, the block stands on your brand card reading «Add your first location», with the line that says this branch becomes the main one: it holds the menu, the programme and the members. - Open your home branch, the «Business details» tab, and scroll to the «Branches and locations» fold. The «Add a branch» block is under it, and it appears on the home branch only. (Web)
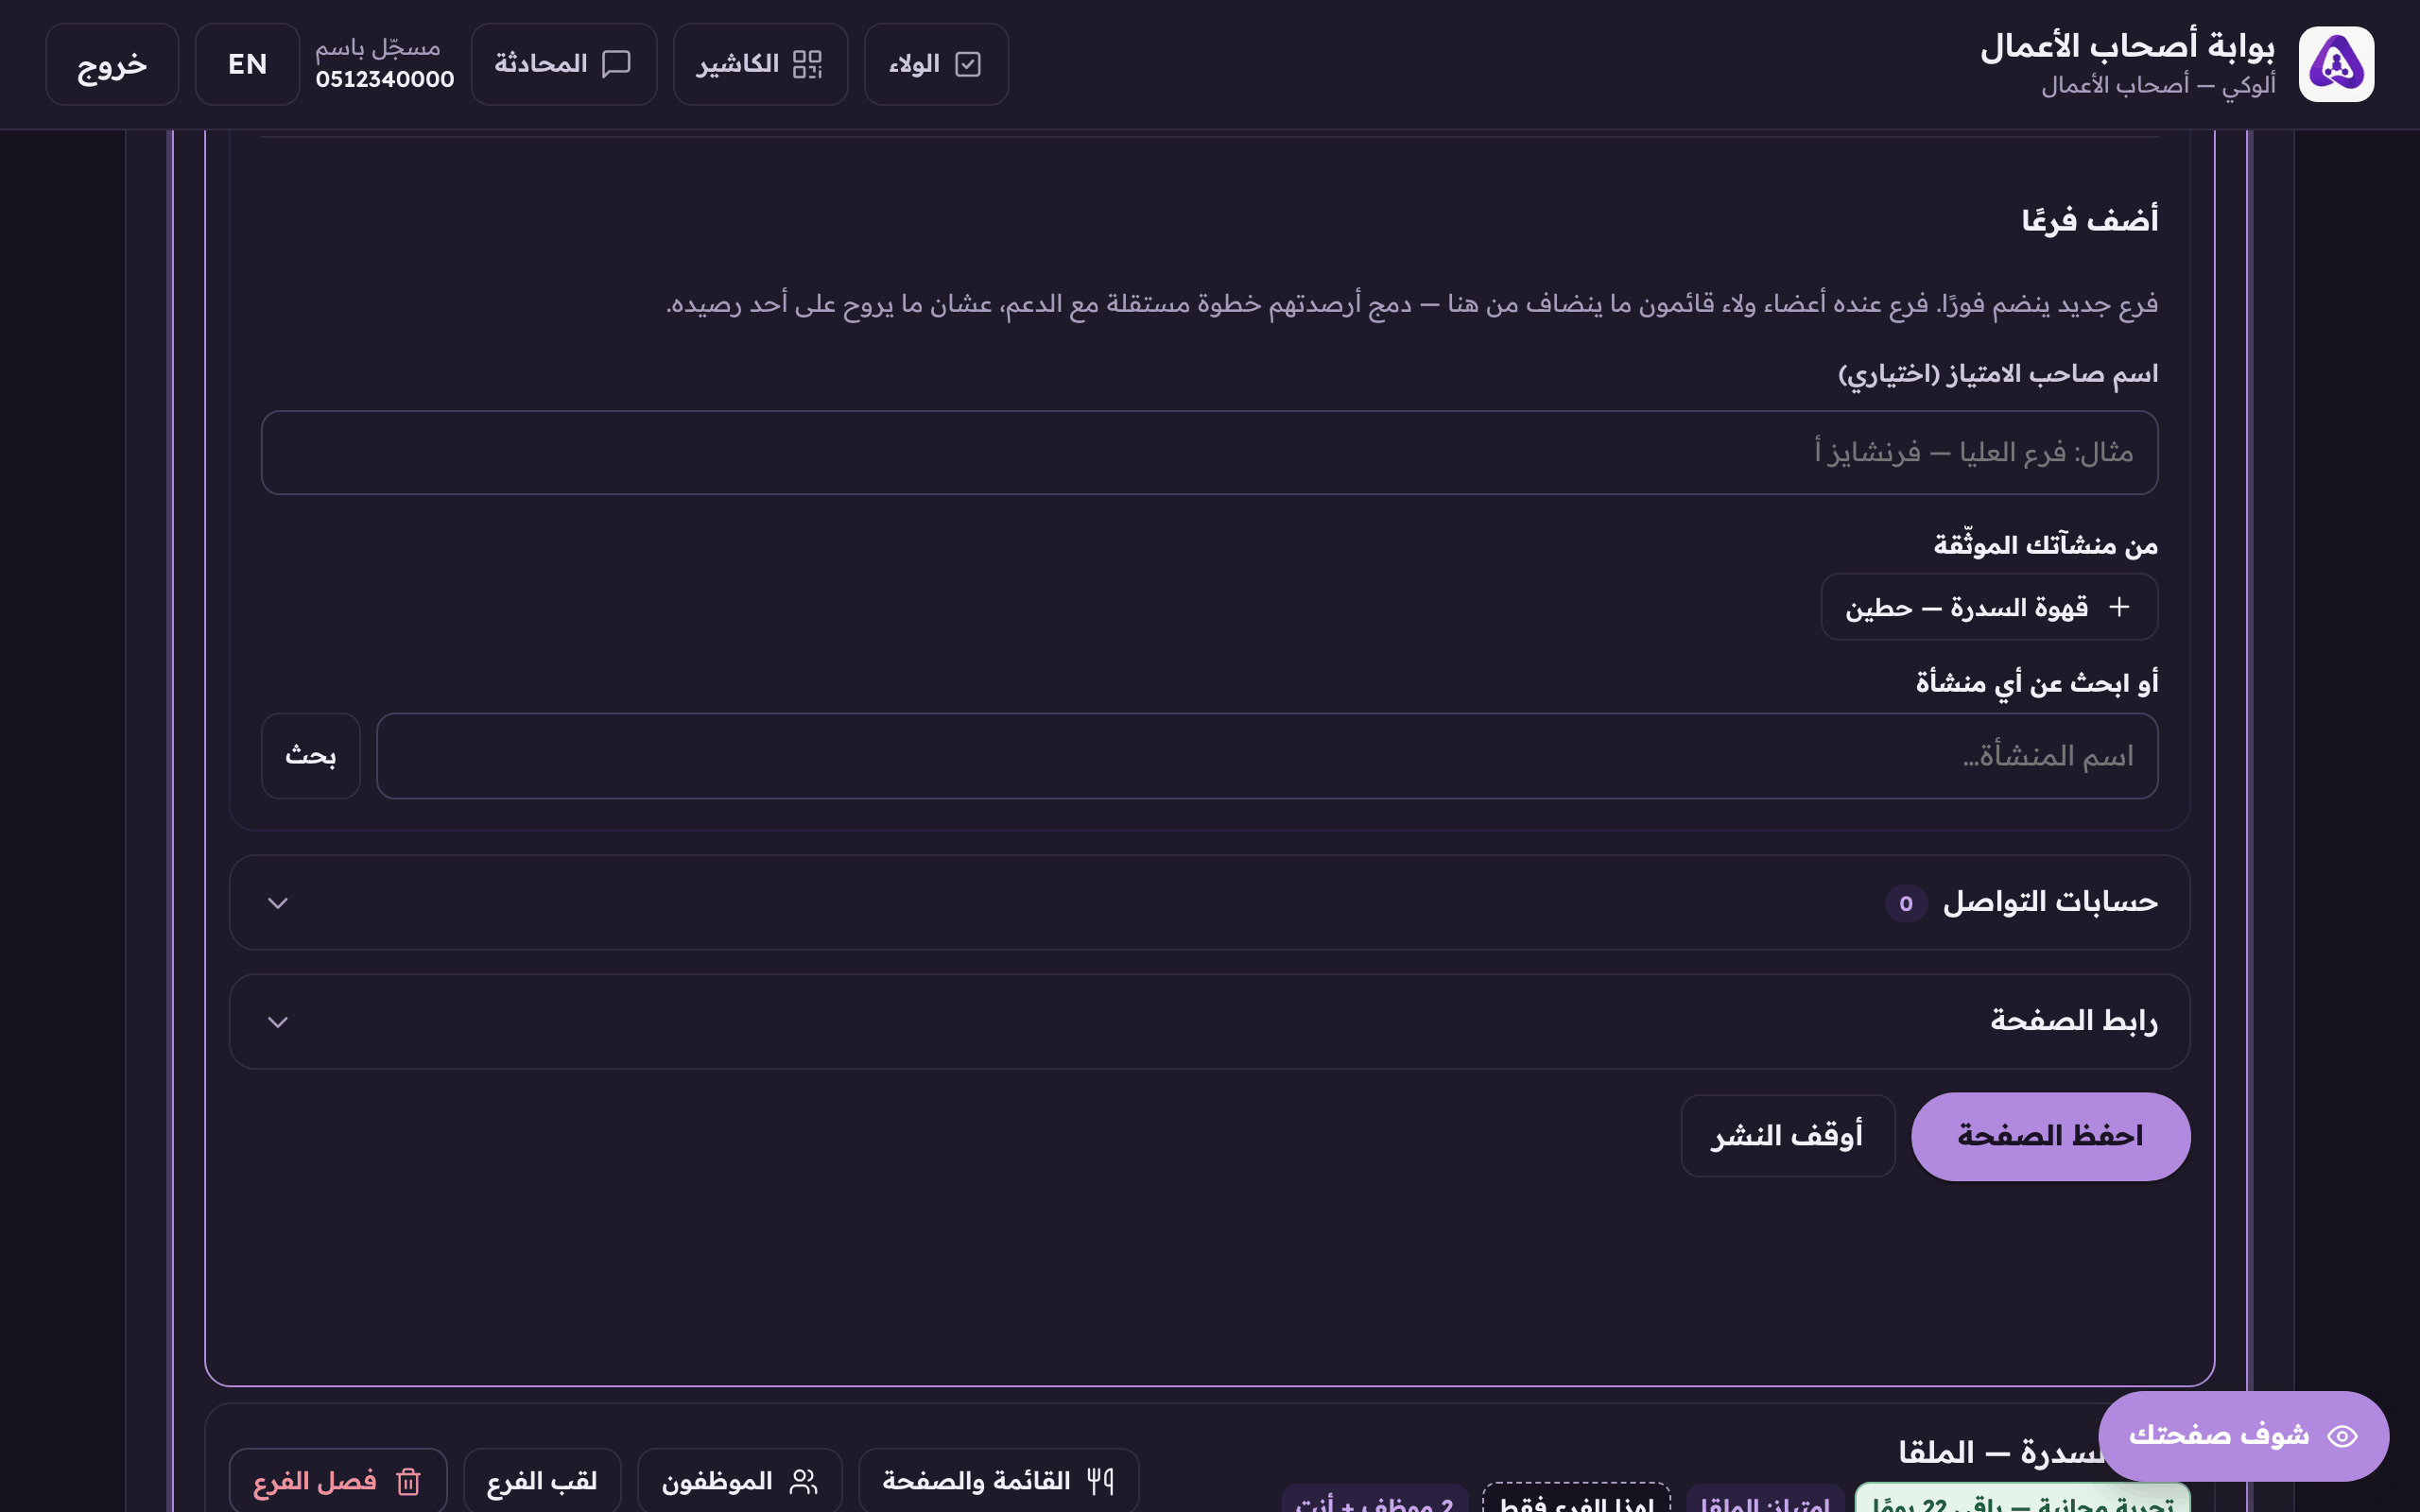
To add a branch, search for it by name here, under «Branches and locations» in the home branch's business info. - Pick it from your verified businesses, or search for it by name.
To add a branch, search for it by name here, under «Branches and locations» in the home branch's business info. - A result you verified carries «Add it as a branch». It joins at once. A result you have not carries «Claim it first». The claim form opens, and the branch shows in your brand as «awaiting our approval» until we review.
- Give it a branch label (optional), useful when the branch is a franchise or has a name of its own.
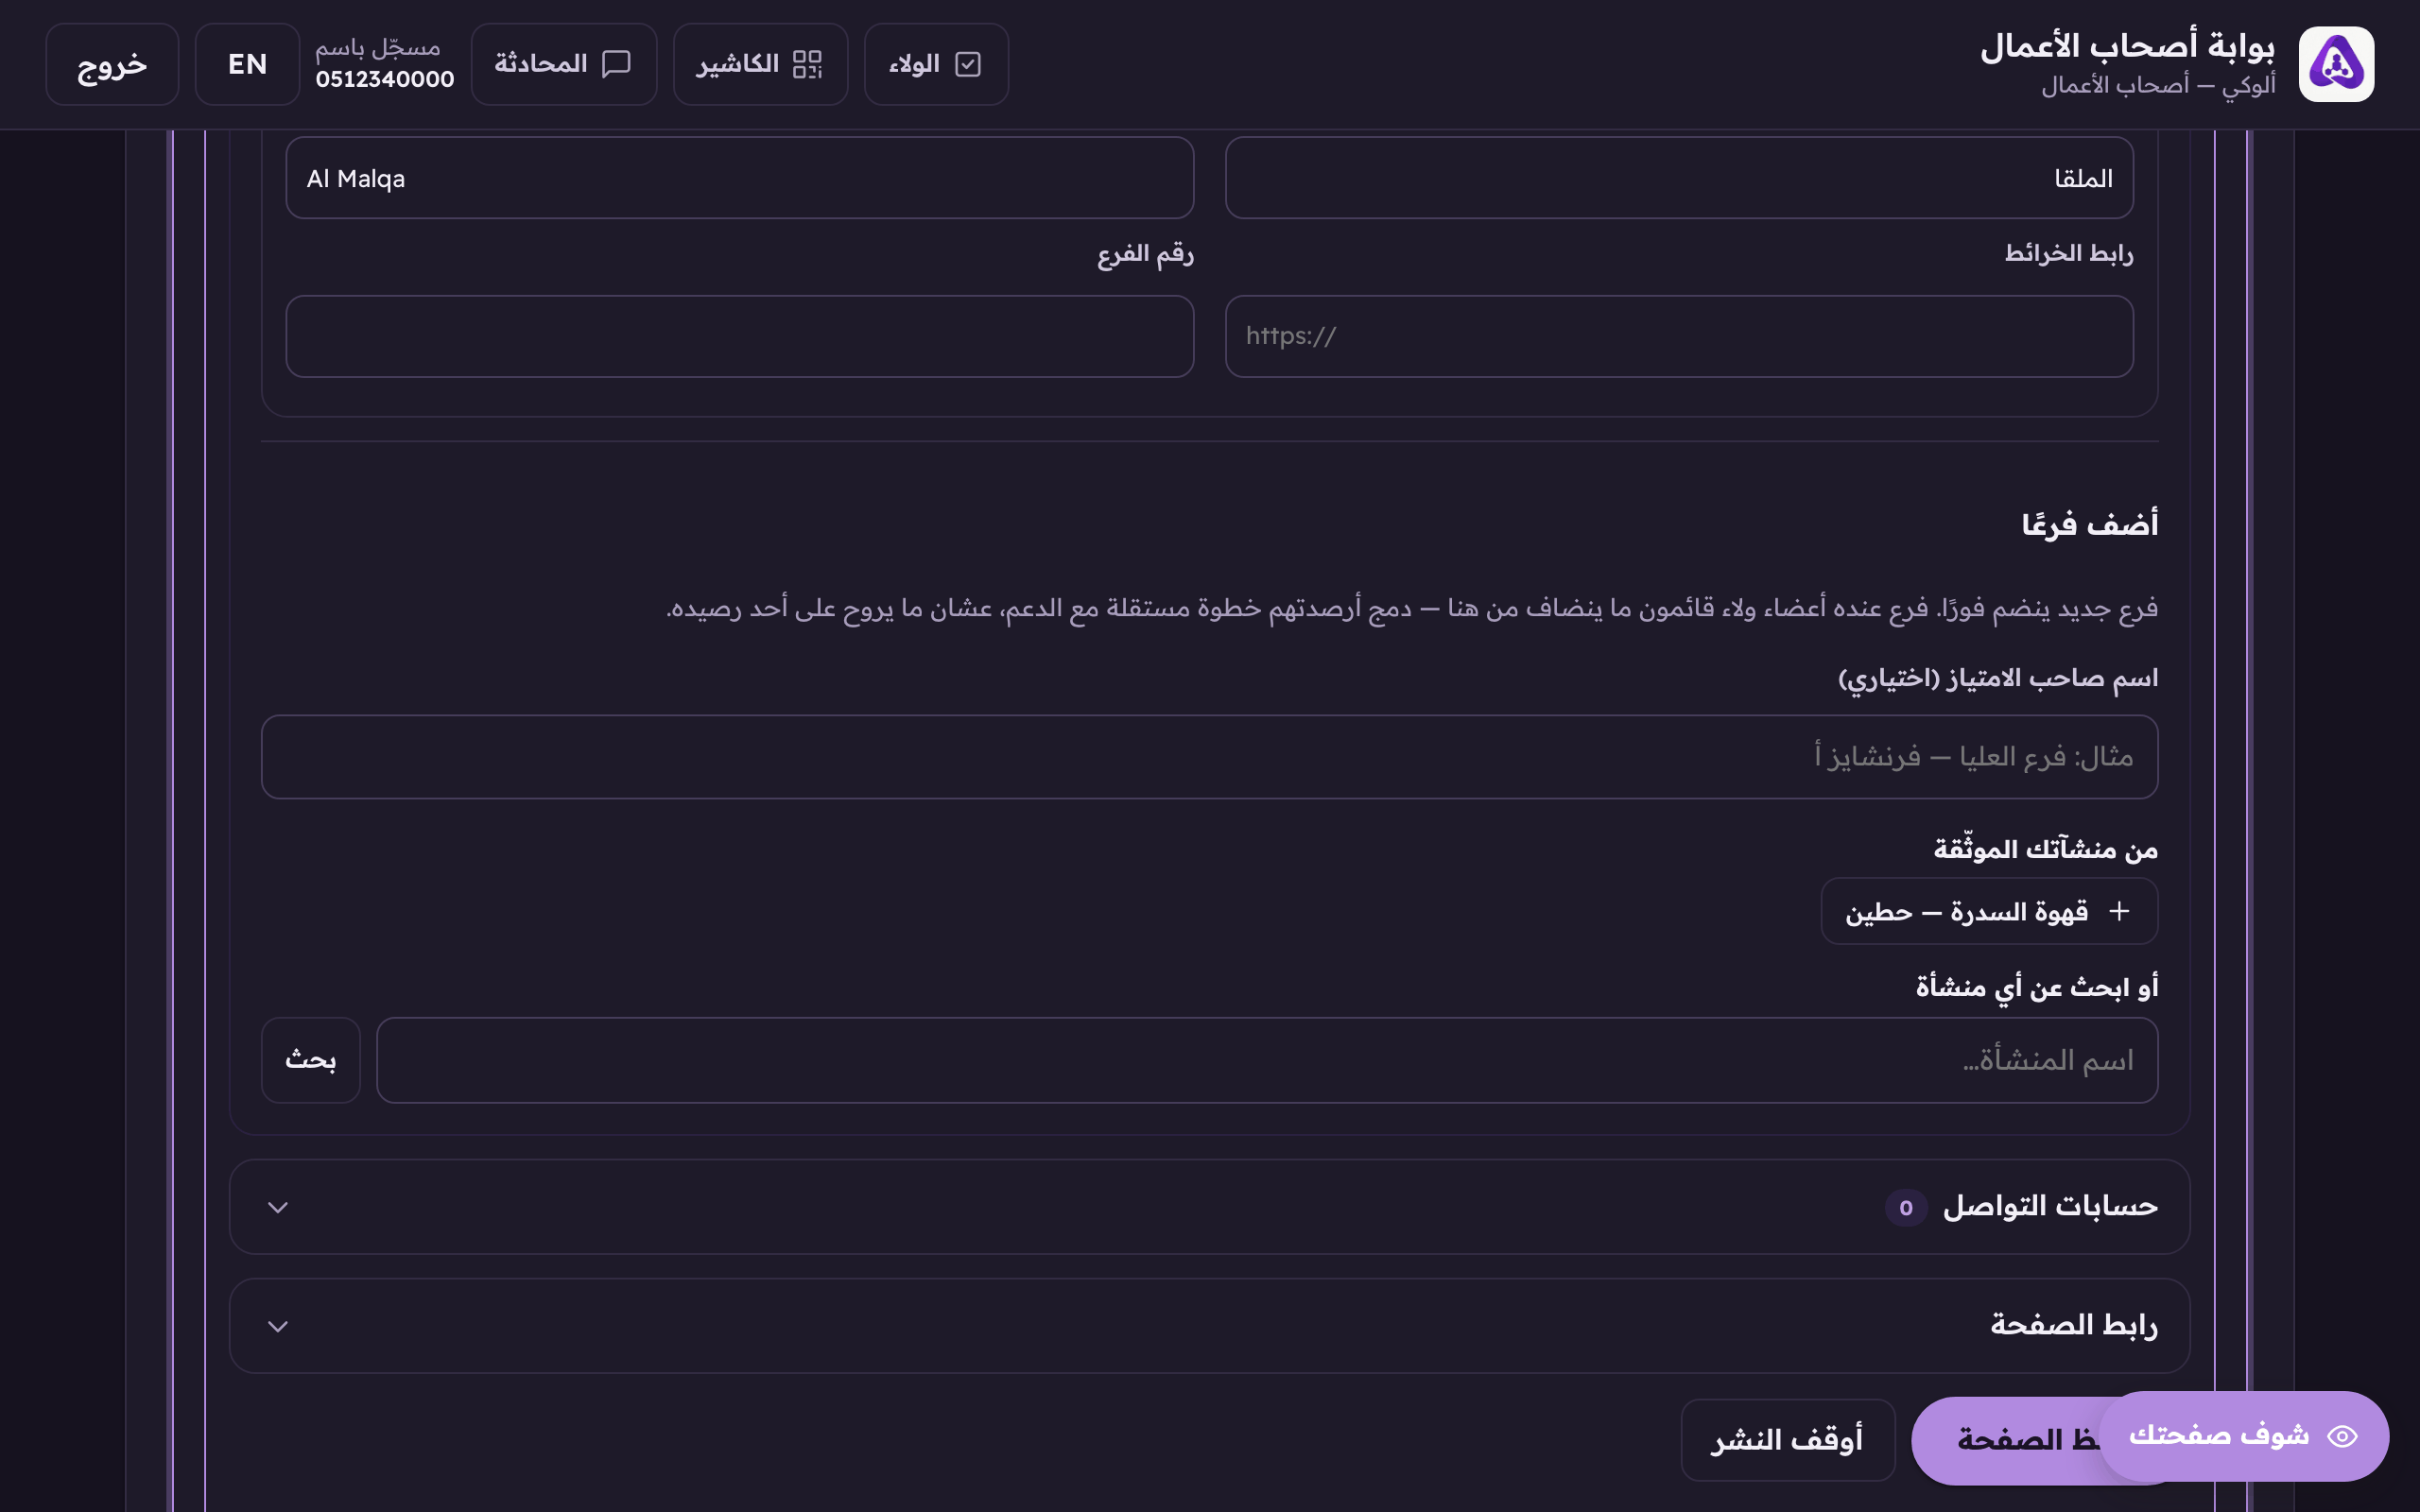
«Franchisee label (optional)», fill it in when the branch is a franchise or carries a name of its own. - To change a branch's label later, press «Branch label» on its row. It renames that branch alone and leaves the others untouched.
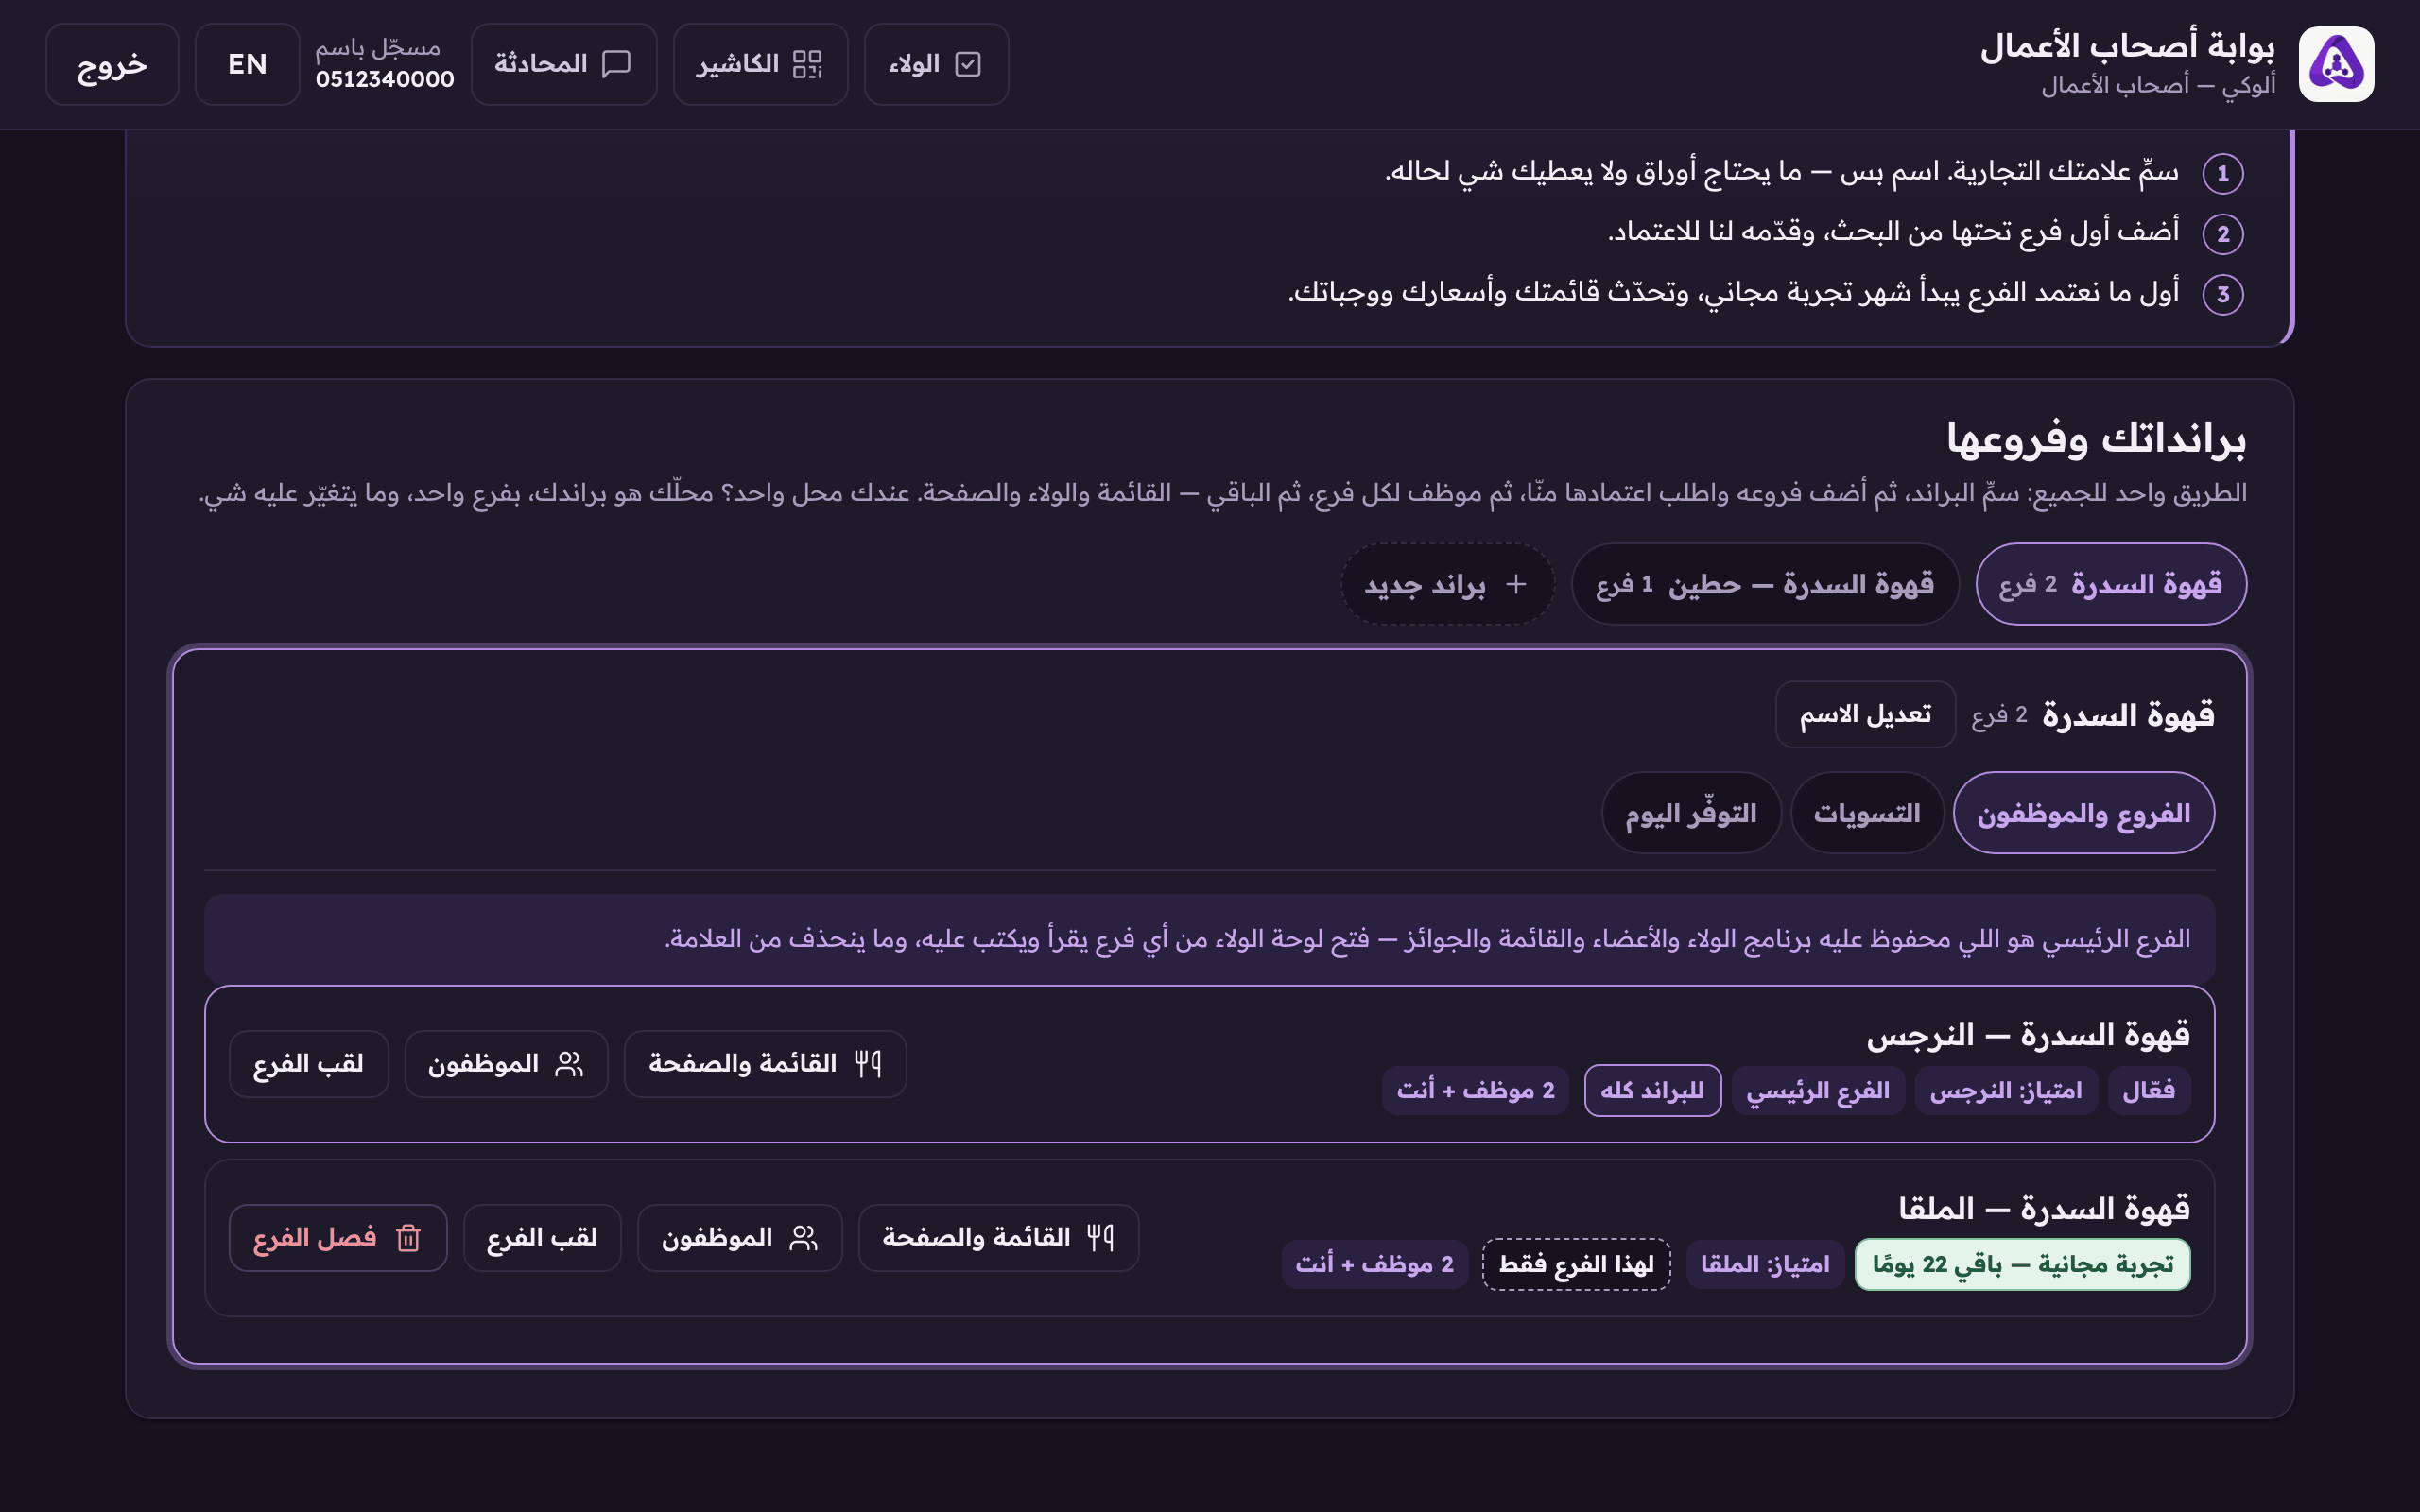
«Branch label» renames this branch alone and leaves the others untouched.
- To detach, press «Detach the branch» on its row. The home branch cannot be detached.
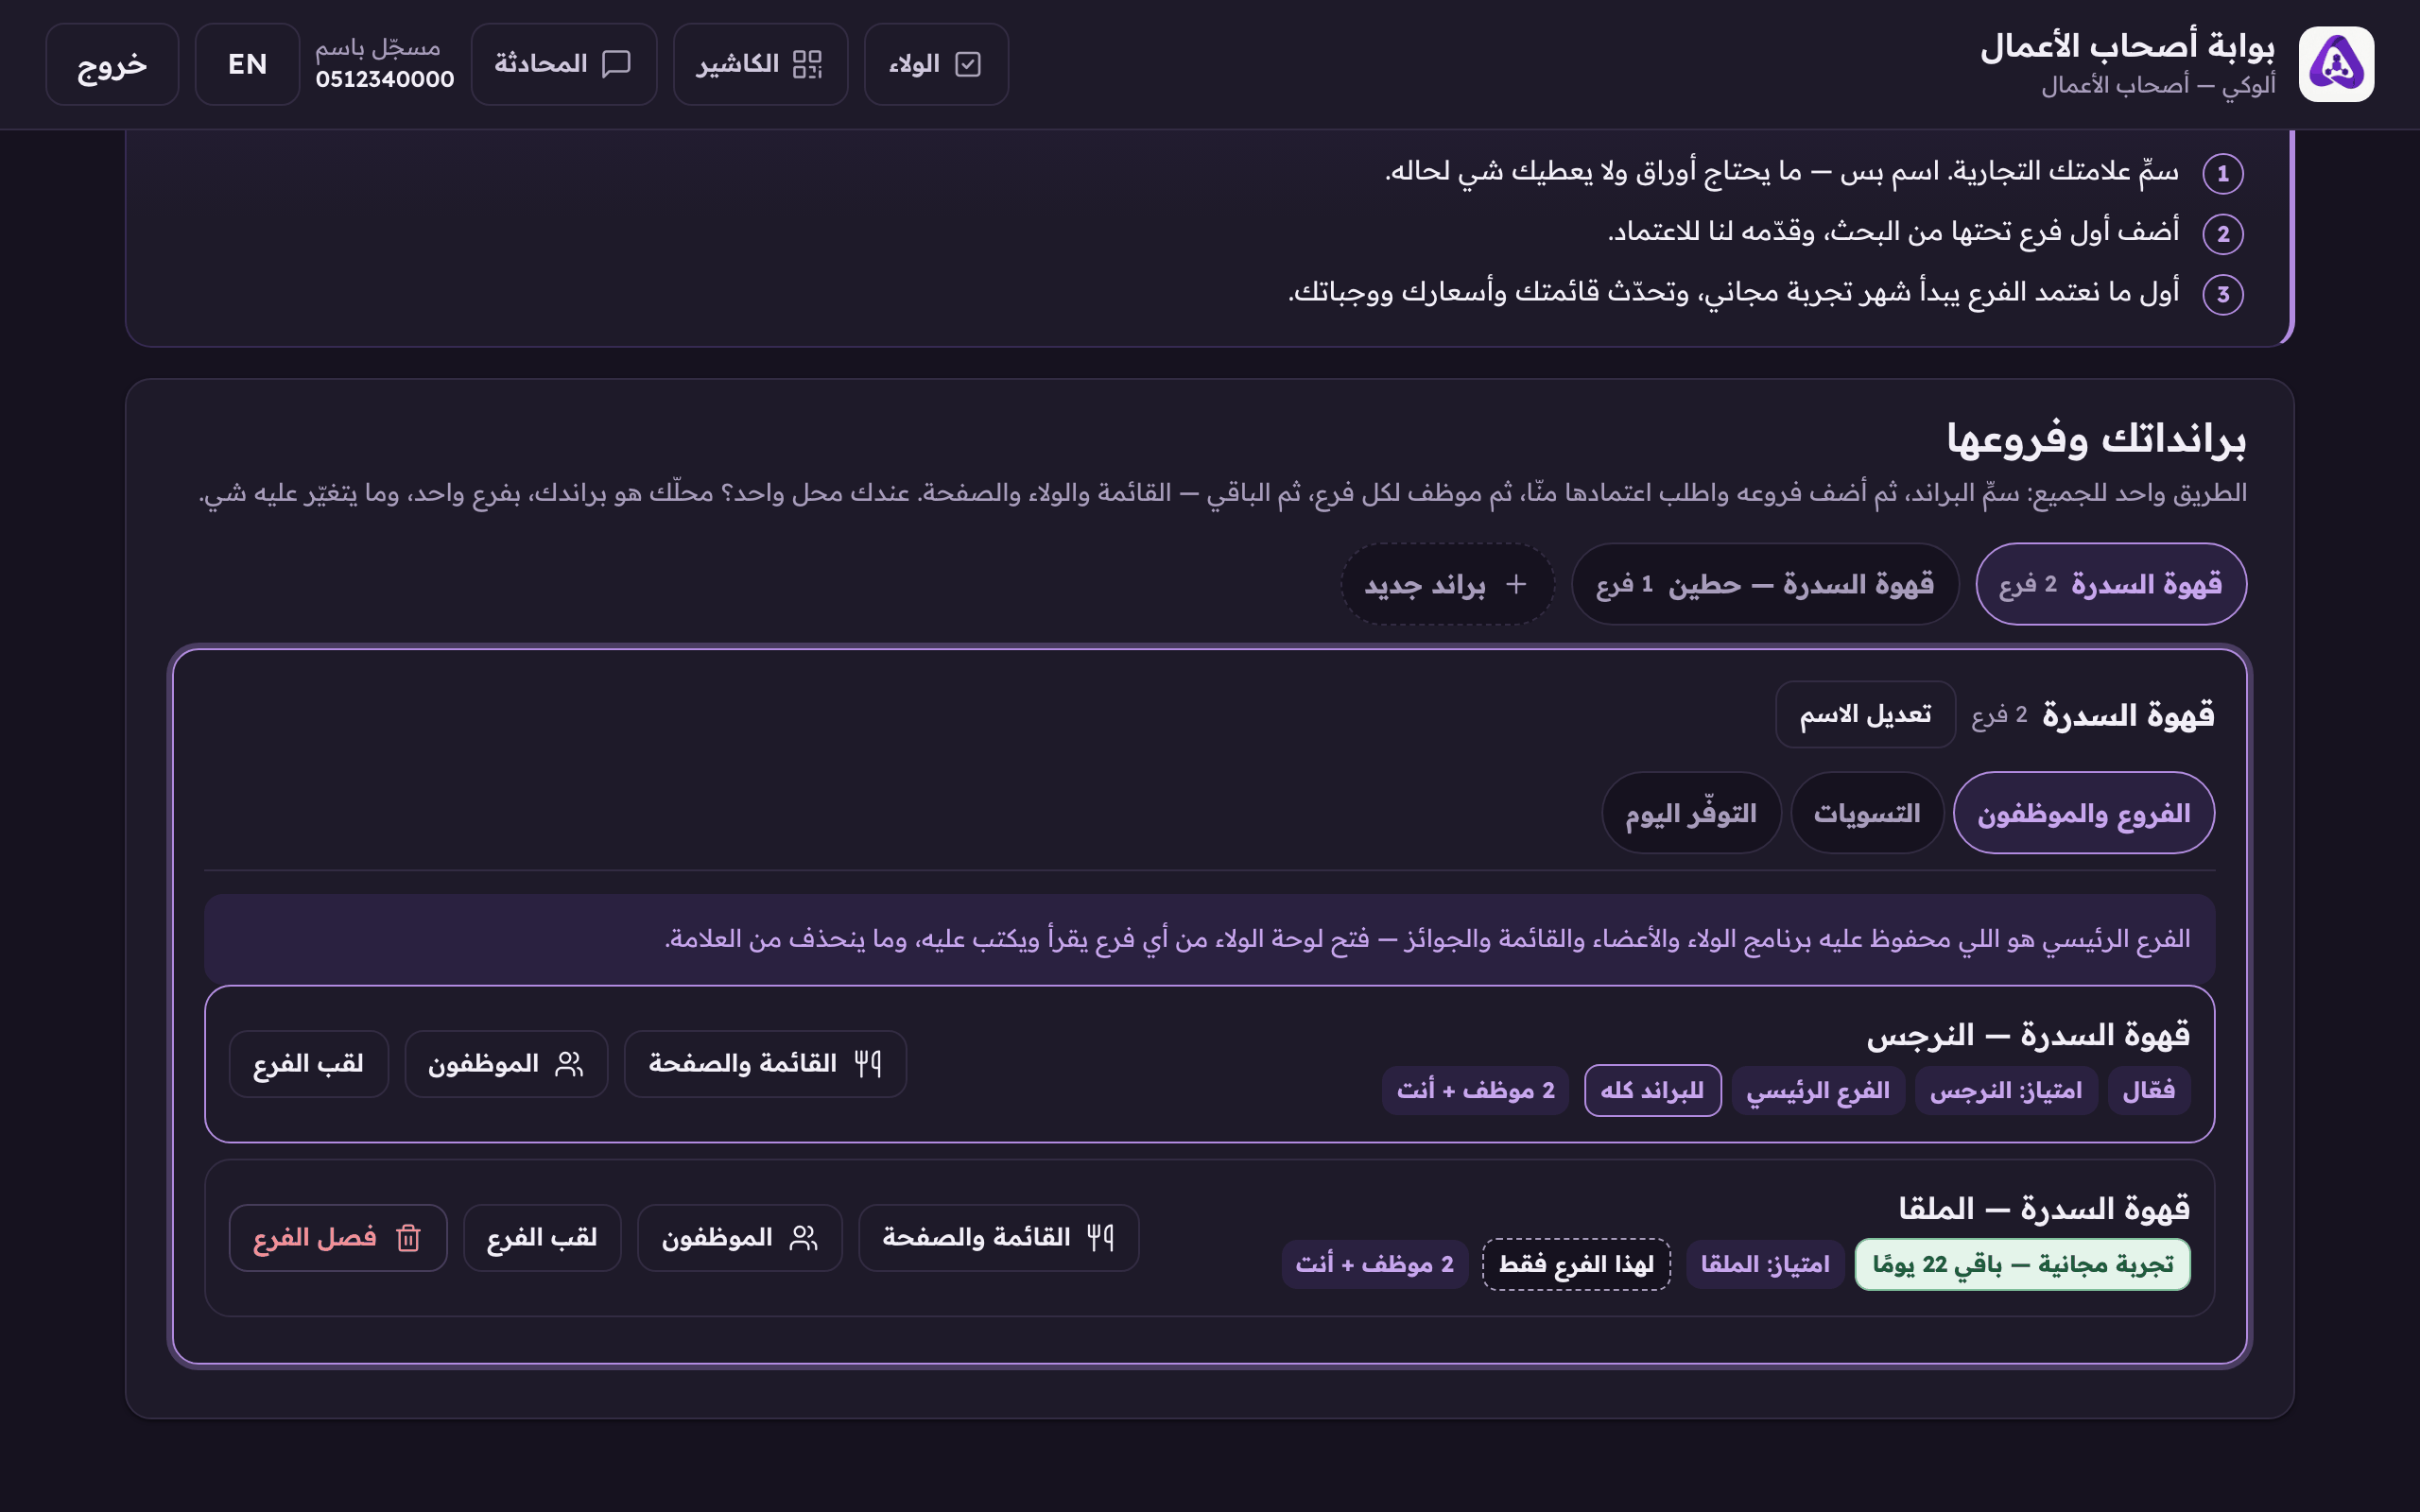
«Detach branch» takes the branch out of your brand. Its customers' balances leave with it, so only use it when you are sure.